
Thyroid ultrasound is a safe, painless imaging test that helps doctors examine your thyroid gland for abnormalities like nodules, cysts, or enlargement. This comprehensive guide is designed for patients preparing for their first thyroid ultrasound, healthcare students learning diagnostic imaging, and anyone trying to understand their thyroid ultrasound results.
You’ll discover what happens during the step-by-step ultrasound procedure, from preparation to completion. We’ll break down how to spot the key signs of abnormality that radiologists look for, including suspicious nodule characteristics and structural changes. Finally, you’ll learn to decode your thyroid ultrasound report so you can better understand what those medical terms and measurements actually mean for your health.
Understanding Thyroid Ultrasound Basics
What thyroid ultrasound reveals about your health
Thyroid ultrasounds give doctors a detailed window into your thyroid’s structure and function. This imaging technique captures real-time images of your thyroid gland, showing its size, shape, texture, and blood flow patterns. The scan can detect nodules as small as 2-3 millimeters, which is much smaller than what doctors can feel during a physical exam.
Your thyroid’s appearance on ultrasound tells a story about your overall health. A healthy thyroid appears smooth and uniform, with consistent texture throughout. When something’s wrong, the ultrasound reveals changes in tissue density, unusual growths, or irregular patterns that might signal conditions like Hashimoto’s thyroiditis, Graves’ disease, or thyroid cancer.
The imaging also shows how well blood flows through your thyroid using color Doppler technology. Increased blood flow often indicates an overactive thyroid, while decreased flow might suggest underactivity or tissue damage. This information helps doctors understand not just what your thyroid looks like, but how well it’s working.
When doctors recommend thyroid imaging
Doctors order thyroid ultrasounds for several specific reasons. The most common trigger is finding lumps or nodules during a routine neck examination. Even if you can’t feel anything unusual, your doctor might detect subtle changes that warrant closer investigation.
Abnormal blood test results also prompt ultrasound recommendations. When your TSH, T3, or T4 levels fall outside normal ranges, imaging helps identify the underlying cause. Family history plays a role too – if thyroid problems run in your family, your doctor might suggest screening ultrasounds even before symptoms appear.
Symptoms that often lead to ultrasound referrals include:
- Difficulty swallowing or breathing
- Persistent neck pain or tenderness
- Unexplained voice changes or hoarseness
- Rapid weight changes without clear cause
- Heart palpitations or anxiety symptoms
- Visible neck swelling or asymmetry
Previous radiation exposure, especially during childhood, increases thyroid cancer risk and often warrants regular ultrasound monitoring.
Key advantages over other diagnostic methods
Thyroid ultrasound stands out from other imaging techniques for several compelling reasons. Unlike CT scans or X-rays, ultrasounds use no ionizing radiation, making them completely safe for pregnant women and children. You can have multiple ultrasounds without any cumulative health risks.
The real-time imaging capability sets ultrasound apart from static imaging methods. Doctors can watch your thyroid function as it happens, observing blood flow patterns and tissue movement. This dynamic view provides insights that snapshots simply can’t match.
Cost-effectiveness makes ultrasound accessible to more patients. The procedure costs significantly less than MRI or CT scans while providing equally valuable diagnostic information for thyroid conditions.
| Imaging Method | Radiation | Cost | Detail Level | Real-time |
| Ultrasound | None | Low | High | Yes |
| CT Scan | High | Medium | Medium | No |
| MRI | None | High | High | No |
| Nuclear Scan | Low | Medium | Low | No |
The precision of modern ultrasound equipment allows for guided procedures. When biopsies are needed, ultrasound guidance ensures accurate needle placement, reducing discomfort and improving sample quality. This eliminates much of the guesswork involved in traditional biopsy techniques.
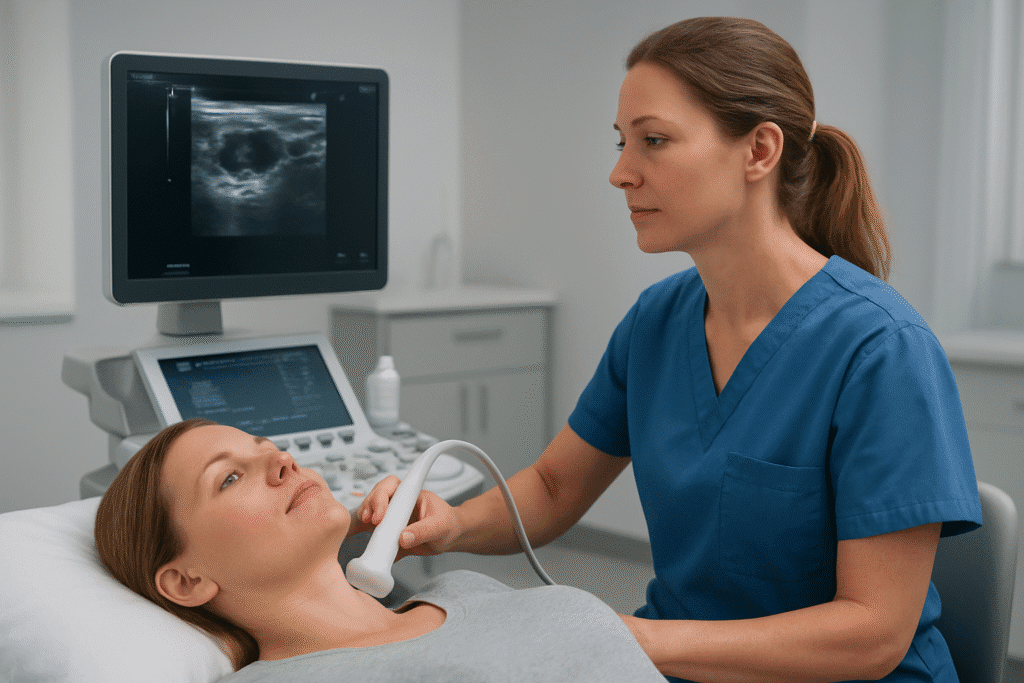
Step-by-Step Ultrasound Procedure
Pre-examination preparation requirements
Getting ready for a thyroid ultrasound is pretty straightforward. You don’t need to fast or avoid any medications beforehand. The main thing you’ll want to do is wear something comfortable with an open neckline or a shirt that can be easily removed from the upper body. V-necks, button-downs, or tops with wide collars work perfectly.
Remove any jewelry around your neck area, including necklaces, chains, or high collars that might get in the way. If you have long hair, bring a hair tie to pull it back so the technologist can access your neck area easily. Some facilities provide gowns that open in the front, but wearing appropriate clothing can save you the hassle of changing.
Tell your technologist about any previous thyroid surgeries, biopsies, or ongoing thyroid treatments. This background information helps them focus on specific areas and compare findings with previous studies if available.
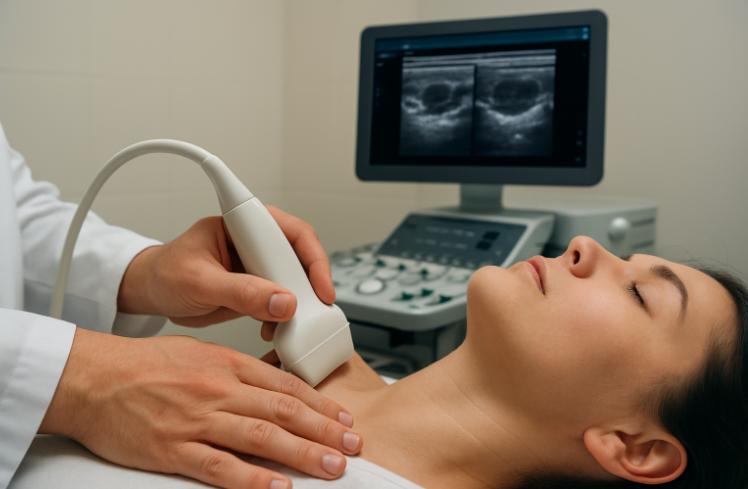
Positioning and gel application process
You’ll lie on your back on an examination table with your head supported by a pillow or cushion. The key is getting your neck in the right position – extended slightly backward to expose the thyroid area fully. Most facilities use a special wedge pillow under your shoulders to create this optimal positioning naturally.
The technologist will apply a clear, water-based ultrasound gel generously across your neck area. This gel might feel cool at first, but it warms up quickly. The gel eliminates air pockets between the transducer and your skin, which would otherwise create artifacts or block the sound waves from penetrating properly.
Don’t worry about the gel – it’s completely harmless, won’t stain your clothes, and wipes off easily with tissue or towels. The amount used might seem excessive, but adequate gel coverage ensures clear, high-quality images throughout the entire examination.
Transducer movement and image capture
The ultrasound transducer looks like a small handheld wand that the technologist will move systematically across your neck. They’ll start by getting an overall view of both thyroid lobes, then focus on specific areas for detailed measurements and documentation.
You’ll feel gentle pressure as the transducer glides over your skin. The technologist might press a bit firmer in certain spots to get better visualization of deeper structures or to move overlying tissues out of the way. This pressure is normal and necessary for optimal image quality.
During the scan, you might hear clicking sounds as the technologist captures still images and takes measurements. They’ll examine your thyroid from multiple angles – front to back, side to side, and top to bottom. The transducer will move in both longitudinal (lengthwise) and transverse (crosswise) orientations to create a complete picture of your thyroid gland.
Expect the technologist to spend extra time on any areas that look different or need closer examination. They might ask you to swallow or hold your breath briefly to better visualize certain structures or reduce motion artifacts.
Typical examination duration and patient comfort
A standard thyroid ultrasound takes anywhere from 15 to 30 minutes, depending on what the technologist finds and whether any abnormalities need extra attention. Most people find the procedure comfortable and even relaxing.
The examination room is usually kept at a comfortable temperature, and you’ll be lying down the entire time. Some patients even fall asleep during longer examinations. If you experience any discomfort from lying in one position, let the technologist know – they can often adjust your positioning or take short breaks.
The only sensation you’ll feel is the gentle pressure from the transducer and the cool gel. There’s no pain, radiation, or side effects associated with ultrasound imaging. If you have a sensitive gag reflex, mention this beforehand, as the neck positioning might trigger this response in some people.
After the examination, you can immediately return to your normal activities. The gel wipes off completely, and there are no restrictions on eating, drinking, or taking medications following the procedure.
Recognizing Normal Thyroid Characteristics
Standard Thyroid Size and Shape Measurements
Your thyroid gland sits right at the base of your neck, wrapped around your windpipe like a butterfly. When doctors measure it during an ultrasound, they’re looking for specific dimensions that tell them whether everything’s working as it should.
A healthy thyroid typically measures about 4-6 centimeters in length and 1.3-1.8 centimeters in thickness for each lobe. The width usually falls between 1.2-2.0 centimeters. The connecting piece between the two lobes, called the isthmus, should be no thicker than 3-4 millimeters.
Women generally have slightly smaller thyroids than men, and age plays a role too. Your thyroid can shrink a bit as you get older, which is completely normal. The total volume for a healthy adult thyroid ranges from 10-25 milliliters, though this can vary based on your body size and geography – people living in areas with less iodine in their diet often have slightly larger thyroids.
The shape should appear symmetrical, with both lobes roughly the same size. Each lobe has smooth, well-defined borders that create clean outlines on the ultrasound screen. Any significant size differences between lobes or irregular contours might catch your doctor’s attention for further evaluation.
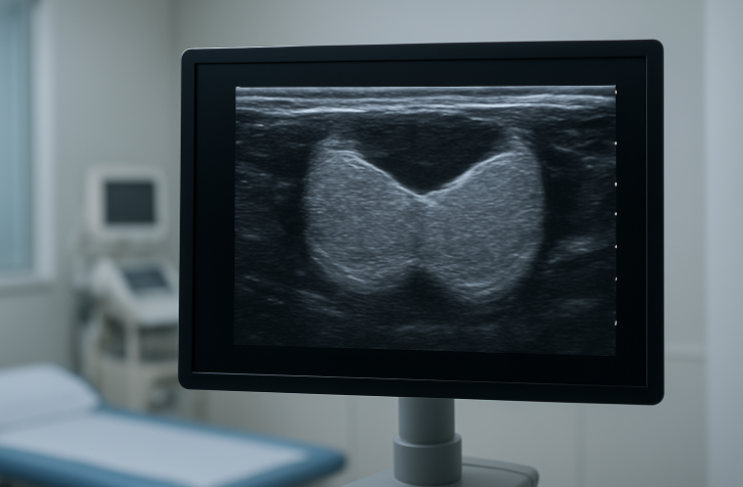
Healthy Tissue Texture and Echogenicity Patterns
When ultrasound waves bounce through your thyroid, they create patterns that reveal what’s happening inside the tissue. Think of it like looking at the grain in a piece of wood – healthy thyroid tissue has its own distinctive pattern that doctors recognize immediately.
Normal thyroid tissue appears homogeneous, meaning it looks uniform throughout without any patchy or mottled areas. The echogenicity – basically how bright or dark the tissue appears on screen – should be slightly brighter than the nearby neck muscles but not as bright as fat tissue.
The texture resembles fine sand or a smooth, even surface without any lumps, bumps, or dark spots scattered throughout. You won’t see any cystic areas (fluid-filled spaces) or calcifications (bright white spots that indicate calcium deposits) in healthy thyroid tissue.
| Tissue Component | Normal Appearance | What It Means |
| Overall texture | Homogeneous, fine-grained | Even distribution of cells |
| Echogenicity | Slightly hyperechoic to muscle | Healthy tissue density |
| Borders | Smooth and well-defined | No inflammation or irregular growth |
| Internal structure | Uniform throughout | No nodules or abnormal areas |
Normal Blood Flow Patterns
Blood flow through your thyroid tells a story about how active and healthy the gland is. During a Doppler ultrasound, doctors can see the blood moving through tiny vessels, painting a picture of your thyroid’s metabolic activity.
Healthy thyroid tissue shows moderate, evenly distributed blood flow throughout both lobes. You’ll see small vessels branching like tiny rivers, carrying blood to nourish the tissue. The flow appears steady and symmetrical – what you see in the right lobe should look similar to the left.
The main arteries feeding your thyroid – the superior and inferior thyroid arteries – should show normal pulsatile flow patterns. This means the blood moves in rhythmic waves that match your heartbeat, without any unusual turbulence or excessive speed.
Normal blood flow velocity typically ranges from 20-40 cm/second in the main feeding arteries. The resistance index, which measures how easily blood flows through the vessels, usually falls between 0.5-0.7. These numbers help doctors understand whether your thyroid is working at the right metabolic pace.
You shouldn’t see any areas with dramatically increased blood flow, which might suggest inflammation or overactivity, nor should there be zones with little to no blood supply, which could indicate problems with tissue health.
Identifying Abnormal Findings and Warning Signs
Nodule Detection and Size Assessment
Thyroid nodules appear as round or oval masses that stand out from the surrounding normal tissue on ultrasound images. These growths can range from tiny 2-3mm spots barely visible on the screen to large masses exceeding several centimeters. Radiologists pay close attention to nodule characteristics, measuring them in three dimensions to track growth over time.
Most nodules appear darker (hypoechoic) than normal thyroid tissue, though some may appear brighter (hyperechoic) or have mixed patterns. The shape matters too – round nodules with smooth borders typically raise fewer concerns than irregularly shaped ones with jagged edges. Multiple nodules scattered throughout the thyroid often indicate multinodular goiter, while a single dominant nodule requires more careful evaluation.
Size alone doesn’t determine whether a nodule is problematic. Small nodules under 1cm are extremely common and usually benign, but larger nodules over 2cm need closer monitoring. The growth rate between scans provides valuable information – rapid growth over months warrants immediate attention, while stable nodules that remain unchanged for years are generally reassuring.
Irregular Tissue Texture and Density Changes
Normal thyroid tissue displays a uniform, fine-grained appearance throughout both lobes. When disease processes begin, this smooth texture becomes disrupted, creating noticeable changes that experienced sonographers can quickly identify.
Coarse, heterogeneous texture often signals chronic thyroiditis or Hashimoto’s disease. The tissue appears mottled with areas of varying brightness, losing its characteristic smooth appearance. Some regions may become fibrous and appear brighter, while others develop a cobblestone-like pattern.
Echo patterns help distinguish different conditions:
- Hypoechoic areas: Darker regions that may indicate inflammation, cysts, or certain types of nodules
- Hyperechoic regions: Brighter areas suggesting fibrosis, calcification, or colloid-filled follicles
- Mixed echogenicity: Patchy appearance combining light and dark areas, common in autoimmune conditions
Changes in tissue density can create shadowing effects behind certain areas, making deeper structures harder to visualize. This acoustic shadowing often occurs behind calcified regions or dense fibrous tissue.
Abnormal Blood Vessel Patterns
Doppler ultrasound reveals blood flow patterns within the thyroid, providing crucial information about tissue health and metabolic activity. Normal thyroid tissue shows moderate, evenly distributed blood flow throughout both lobes.
Hypervascular patterns with increased blood flow often accompany hyperthyroidism, particularly Graves’ disease. The entire gland may light up with color signals showing intense circulation, sometimes described as a “thyroid inferno” pattern due to the dramatic increase in blood flow.
Nodules display various vascular patterns that help determine their nature:
| Flow Pattern | Description | Clinical Significance |
| Absent flow | No color signals within nodule | Often suggests benign cystic lesions |
| Peripheral flow | Blood vessels around nodule edges | Common in benign nodules |
| Central flow | Vessels penetrating nodule center | May indicate higher metabolic activity |
| Chaotic flow | Irregular, twisted vessel patterns | Can suggest malignancy |
Suspicious vascular patterns include penetrating central vessels, arteriovenous malformations, or completely avascular solid masses. These findings prompt additional testing and closer monitoring.
Enlargement and Structural Distortions
Thyroid enlargement, called goiter, creates noticeable changes in gland size and shape. Normal adult thyroid lobes measure approximately 4-6cm in length, 1.5-2cm in width, and 2-3cm in thickness. Measurements exceeding these ranges indicate enlargement.
Diffuse enlargement affects the entire gland uniformly, maintaining normal shape while increasing overall size. This pattern commonly occurs with iodine deficiency, autoimmune conditions, or certain medications. The enlarged gland may compress nearby structures like the trachea or esophagus.
Asymmetric enlargement creates uneven lobe sizes or irregular contours. One lobe may become significantly larger than the other, or focal bulges may develop. These distortions can indicate:
- Multinodular goiter with dominant nodules
- Unilateral thyroiditis affecting one lobe
- Mass lesions causing displacement
- Previous surgery creating anatomical changes
Structural changes extend beyond simple size increases. The thyroid’s butterfly shape may become distorted, with lobes extending behind the sternum (substernal extension) or wrapping around the trachea. The isthmus connecting both lobes may thicken significantly or develop nodular changes.
Position shifts also occur with severe enlargement. The thyroid may descend lower in the neck or rotate from its normal position, making complete evaluation challenging.
Calcification Deposits and Their Significance
Calcium deposits within thyroid tissue create bright, reflective spots on ultrasound images, often accompanied by acoustic shadowing that blocks sound waves from penetrating deeper structures. These calcifications come in different forms, each carrying distinct clinical implications.
Microcalcifications appear as tiny, punctate bright spots scattered throughout tissue. These small deposits, typically less than 2mm, raise concern for papillary thyroid cancer when found within solid nodules. The more numerous and clustered these microcalcifications become, the higher the suspicion for malignancy.
Coarse calcifications form larger, chunky deposits that cast prominent shadows. These typically develop in benign conditions like multinodular goiter or degenerating nodules. The calcium deposits may outline the edges of nodules (rim calcification) or create irregular patterns throughout.
Egg-shell calcifications create thin, curved lines around nodule peripheries, resembling broken eggshells. While usually benign, thick or interrupted rim calcifications can occasionally indicate malignancy.
Different calcification patterns help guide clinical decisions:
- Benign patterns: Coarse, peripheral, or rim calcifications in cystic lesions
- Suspicious patterns: Microcalcifications within solid nodules, especially when clustered
- Mixed patterns: Combinations requiring individual assessment based on overall nodule characteristics
The location and distribution of calcifications matter as much as their appearance. Calcifications within lymph nodes may indicate metastatic disease, while those in normal thyroid tissue often reflect chronic inflammatory changes or previous trauma.
Decoding Your Thyroid Ultrasound Report
Technical terminology explained in simple terms
Your thyroid ultrasound report contains medical terms that might seem confusing at first glance. “Echogenicity” refers to how bright or dark your thyroid appears on the ultrasound image. A “hyperechoic” area shows up brighter than normal tissue, while “hypoechoic” appears darker. “Isoechoic” means the tissue looks the same as surrounding normal thyroid tissue.
“Heterogeneous” describes uneven texture throughout your thyroid, which can signal inflammation or other changes. “Homogeneous” means the texture looks uniform. When radiologists mention “vascularity,” they’re talking about blood flow patterns they can see using color Doppler imaging.
Nodules are lumps or masses within your thyroid. “Solid” nodules are made of tissue, while “cystic” ones contain fluid. “Complex” nodules have both solid and fluid components. The term “calcifications” refers to calcium deposits that show up as bright white spots on the ultrasound.
“Bilateral” means both sides of your thyroid are affected, while “unilateral” means only one side. The “isthmus” is the bridge of tissue connecting your thyroid’s two lobes. When reports mention “lymph nodes,” they’re describing small immune system structures near your thyroid that can sometimes enlarge when there’s inflammation or other issues.
Measurement values and their clinical meaning
Thyroid size measurements help doctors determine if your gland is normal, enlarged, or shrunken. Normal thyroid dimensions typically range from 4-6 centimeters in length, 1.3-1.8 centimeters in width, and 1.0-1.5 centimeters in thickness for each lobe. The isthmus usually measures 2-6 millimeters thick.
Nodule measurements are recorded in three dimensions, with the largest diameter being most important for monitoring. Nodules smaller than 1 centimeter are generally considered low-risk and may only need periodic monitoring. Those between 1-4 centimeters often require closer evaluation, while nodules larger than 4 centimeters have higher chances of being cancerous and typically need biopsy.
Volume calculations help track changes over time. Your thyroid’s total volume normally ranges from 10-25 milliliters, with women typically having smaller thyroids than men. Significant volume increases might indicate conditions like goiter or Graves’ disease.
Blood flow measurements using Doppler ultrasound show how active your thyroid is. Increased blood flow often accompanies hyperthyroidism, while decreased flow might suggest hypothyroidism or thyroiditis. The resistance index (RI) and pulsatility index (PI) are specific measurements that help doctors understand your thyroid’s blood supply patterns.
Risk level classifications and follow-up recommendations
Ultrasound reports often include risk stratification systems that help predict the likelihood of cancer. The TI-RADS (Thyroid Imaging Reporting and Data System) assigns scores from 1-5, with higher numbers indicating greater cancer risk.
| TI-RADS Score | Risk Level | Typical Follow-up |
| 1-2 | Very low to low | Routine monitoring |
| 3 | Low to intermediate | Follow-up in 1-2 years |
| 4 | Intermediate to moderate | Biopsy consideration |
| 5 | High suspicion | Biopsy recommended |
Benign-appearing nodules usually need follow-up ultrasounds every 1-2 years to check for growth or changes. Suspicious features like irregular borders, microcalcifications, or unusual growth patterns prompt more aggressive monitoring or immediate biopsy recommendations.
Your doctor might recommend fine needle aspiration (FNA) biopsy for nodules meeting certain criteria. This minimally invasive procedure helps distinguish between benign and malignant nodules. Some reports suggest repeat ultrasounds in 6-12 months for borderline cases.
Follow-up timing also depends on your symptoms, family history, and other risk factors. Patients with radiation exposure history or genetic predispositions often need more frequent monitoring regardless of initial ultrasound findings.
Questions to ask your healthcare provider
Prepare specific questions about your ultrasound results to make the most of your appointment. Ask your doctor to explain what “normal” means for your specific situation, as reference ranges can vary based on age, gender, and body size.
If nodules were found, inquire about their characteristics: “Are my nodules solid, cystic, or mixed?” and “What features make them appear benign or concerning?” Understanding growth patterns is equally important – ask whether any nodules have changed since previous scans.
Clarify your follow-up plan by asking when you need your next ultrasound and what symptoms should prompt earlier evaluation. Questions like “What changes would concern you enough to recommend biopsy?” help you understand monitoring goals.
Discuss how your ultrasound results relate to your symptoms and blood work. Ask whether thyroid hormone levels correlate with structural findings and if treatment might change based on imaging results. If you’re already taking thyroid medication, inquire how ultrasound findings might affect your dosage or treatment approach.
Request copies of your images and reports for your records. Ask your provider to identify key structures and abnormalities on the actual ultrasound images – visual explanations often make complex findings much clearer than written reports alone.
Thyroid ultrasounds give you a clear window into your thyroid’s health without any pain or radiation exposure. The procedure itself takes just 15-30 minutes, and knowing what to expect can help ease any anxiety about the appointment. When you understand the difference between normal thyroid tissue and potential red flags like nodules, irregular shapes, or unusual blood flow patterns, you’re better equipped to have meaningful conversations with your healthcare provider.
Reading your ultrasound report doesn’t have to feel like deciphering a foreign language. Armed with knowledge about common terms and measurements, you can actively participate in discussions about your thyroid health and treatment options. If your results show anything concerning, remember that many thyroid conditions are highly treatable when caught early. Don’t hesitate to ask your doctor questions about your results – being an informed patient is one of the best things you can do for your long-term health.