

“Comprehensive HIP MRI Protocols: From Scan Planning to Image Optimization”
MRI Hip Joints Protocols, Parameters, and Planning: Your Complete Technical Guide
Getting hip MRI imaging right requires precision, planning, and the right technical approach. This comprehensive guide targets MRI technologists, radiologic technicians, and imaging professionals who need practical knowledge for producing high-quality hip magnetic resonance imaging studies.
Hip MRI protocol optimization can make the difference between diagnostic images and repeat scans. You’ll need to master patient positioning, select appropriate hip MRI pulse sequences, and adjust hip MRI technical parameters to capture the complex anatomy of the hip joint effectively.
We’ll walk through essential pre-scanning preparation techniques that set you up for success before the patient even enters the scanner. You’ll discover how proper positioning and communication can eliminate common artifacts and reduce scan time.
Next, we’ll cover standard pulse sequences and optimal technical parameters that form the backbone of any solid hip MRI protocol. We’ll break down T1, T2, STIR, and specialized sequences, explaining when to use each one and how to adjust parameters like slice thickness, field of view, and matrix size for your specific clinical questions.
Finally, we’ll explore strategic imaging planes and specialized pathology protocols that help you capture comprehensive hip joint anatomy. From routine screening to targeted protocols for labral tears, avascular necrosis, and inflammatory conditions, you’ll learn how to tailor your hip MRI imaging planes and sequences to match the clinical indication.
Essential Pre-Scanning Preparation for Hip MRI Success
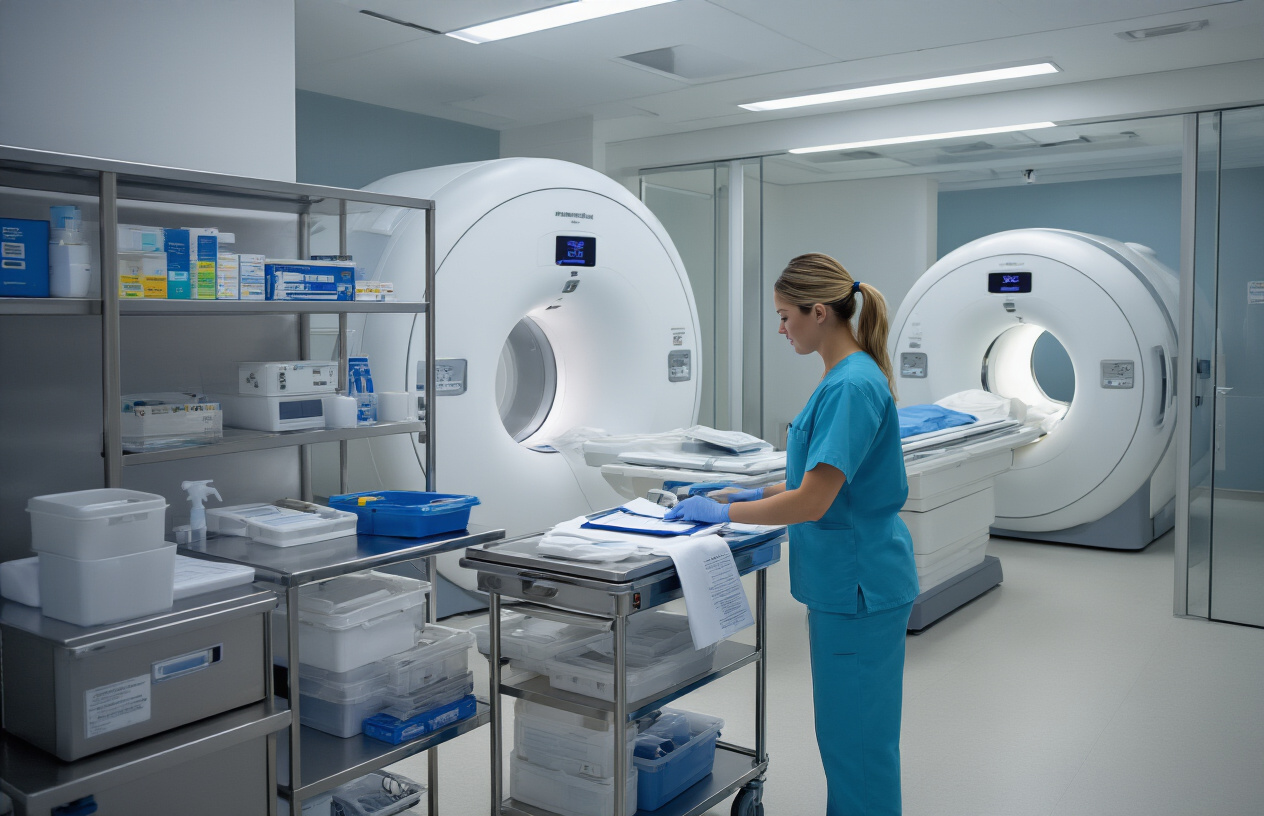
Patient Positioning Techniques for Optimal Image Quality
Proper patient positioning forms the foundation of successful hip MRI imaging and directly impacts diagnostic image quality. The standard supine position remains the gold standard for hip MRI protocols, with patients lying flat on their back with both legs extended. This position provides excellent access to the hip joint anatomy while maintaining patient comfort during the extended scanning time.
Leg positioning requires careful attention to detail. Both legs should be placed in slight internal rotation, typically 15-20 degrees, which optimizes visualization of the femoral neck and reduces magic angle artifacts. Using positioning aids such as foam wedges or sandbags helps maintain consistent leg alignment throughout the scan. The feet should be secured with straps or tape to prevent movement, particularly during longer pulse sequences.
Hip centering plays a crucial role in MRI hip joint preparation. The laser alignment should target the greater trochanter or the midpoint between the anterior superior iliac spine and the pubic symphysis. This centering ensures both hips remain within the optimal field of view and receive uniform signal intensity across all imaging planes.
Patient comfort directly correlates with image quality, as movement artifacts can severely compromise diagnostic value. Providing adequate padding under the knees and lower back helps reduce discomfort during the examination. Clear communication about scan duration and the importance of remaining still helps achieve better patient cooperation.
For bilateral hip assessment, the field of view should encompass both hip joints symmetrically. This approach allows for comparative analysis and helps identify subtle abnormalities that might be missed when imaging only the symptomatic side.
Coil Selection Strategies for Maximum Signal Capture
Coil selection represents a critical component of hip MRI technical parameters that directly influences signal-to-noise ratio and overall image quality. The choice between different coil configurations depends on the specific clinical indication, patient anatomy, and available equipment.
Phased array surface coils offer the highest signal-to-noise ratio for hip imaging and should be the first choice when available. These multi-element coils provide excellent coverage of the hip joint while maintaining superior signal quality compared to body coils. The flexible design allows optimal conforming to patient anatomy, maximizing signal capture from the region of interest.
For unilateral hip pathology protocols, dedicated hip coils or smaller surface coils positioned over the affected joint provide exceptional detail for focused examinations. These specialized coils excel at detecting subtle labral tears, cartilage defects, and early osteonecrosis changes that require high-resolution imaging.
Body coils work best for bilateral hip comparisons or when surface coils cannot be properly positioned due to patient limitations such as obesity or hardware. While signal quality may be slightly reduced, body coils ensure uniform signal across both hips and provide adequate diagnostic information for most clinical scenarios.
Coil positioning requires precise placement to optimize signal capture. Surface coils should be positioned as close to the skin surface as possible without causing patient discomfort. The coil center should align with the femoral head and neck region, ensuring maximum signal from the most diagnostically important anatomy.
Proper coil connection and tuning verification before scanning prevents technical failures that could compromise the entire examination. Modern MRI systems typically provide automatic coil recognition and tuning, but manual verification remains good practice for consistent results in hip magnetic resonance imaging protocols.
Standard Hip MRI Pulse Sequences and Their Clinical Applications
T1-weighted sequences for anatomical detail visualization
T1-weighted sequences serve as the foundation of any comprehensive hip MRI protocol, offering exceptional anatomical detail that makes them perfect for evaluating bone and soft tissue structures. These sequences produce high signal intensity from fat and low signal intensity from fluid, creating natural contrast that highlights normal anatomy and pathological changes.
When imaging the hip joint, T1-weighted sequences excel at demonstrating bone marrow architecture, cortical bone integrity, and muscle definition. The high spatial resolution achievable with these pulse sequences allows radiologists to identify subtle changes in trabecular bone patterns, which can be early indicators of conditions like avascular necrosis or stress fractures. Fat-suppressed T1-weighted images after gadolinium administration become particularly valuable for detecting enhancement patterns in inflammatory conditions and tumors.
The typical parameters for hip MRI T1-weighted sequences include repetition times (TR) of 400-800 milliseconds and echo times (TE) of 8-15 milliseconds. These technical parameters ensure optimal tissue contrast while maintaining reasonable scan times. Slice thickness usually ranges from 3-5 millimeters with minimal interslice gaps to capture fine anatomical details without compromising coverage.
T1-weighted imaging proves especially useful for assessing joint effusions against the background of high-signal fat, making small amounts of fluid easily detectable. The sequences also provide excellent delineation of the acetabular labrum, joint capsule, and surrounding musculature, which are critical for comprehensive hip assessment.
T2-weighted imaging for fluid detection and pathology identification
T2-weighted sequences represent the workhorse of hip MRI pathology detection, with their ability to highlight fluid-containing structures and inflammatory changes. These pulse sequences generate high signal intensity from fluid and low signal intensity from fibrous tissue, making them ideal for identifying joint effusions, bone marrow edema, and soft tissue injuries.
The sensitivity of T2-weighted imaging for detecting bone marrow changes makes it indispensable for diagnosing conditions like transient osteoporosis of the hip, osteomyelitis, and early avascular necrosis. Bone marrow edema appears as areas of increased signal intensity on T2-weighted images, often preceding more obvious changes visible on other sequences.
Standard T2-weighted hip MRI parameters typically employ TR values of 3000-6000 milliseconds and TE values of 80-120 milliseconds. Fast spin-echo techniques are commonly used to reduce scan times while maintaining excellent image quality. Fat suppression techniques like STIR (Short Tau Inversion Recovery) or spectral fat saturation enhance the detection of pathological fluid accumulation by eliminating the competing high signal from fat.
T2-weighted sequences prove particularly valuable for evaluating hip labral tears, where the normal low-signal labrum contrasts sharply with high-signal fluid that may accumulate in tear sites. These images also excel at demonstrating joint effusions, synovial thickening, and inflammatory changes around the hip joint. The ability to detect subtle fluid collections makes T2-weighted imaging essential for diagnosing conditions like septic arthritis, where early detection can prevent serious complications.
Fluid-sensitive sequences also help assess the integrity of the joint capsule and detect paralabral cysts, which often communicate with labral tears and provide important diagnostic clues about underlying pathology.
Optimal Technical Parameters for High-Quality Hip Imaging
Field of view adjustments for complete joint coverage
Getting the field of view (FOV) right for hip MRI parameters makes the difference between capturing everything you need and missing critical anatomy. The standard FOV for hip joint imaging typically ranges from 32-40 cm, but this isn’t a one-size-fits-all situation. Patient body habitus, bilateral versus unilateral studies, and specific clinical questions all influence your FOV selection.
For unilateral hip studies, a FOV of 32-36 cm usually provides adequate coverage while maintaining optimal spatial resolution. This size captures the entire femoral head, acetabulum, and surrounding soft tissues without unnecessary anatomy that could reduce image quality. Bilateral hip examinations require a larger FOV, typically 38-42 cm, to encompass both hip joints while keeping them within the homogeneous portion of the magnetic field.
The phase-encoding direction significantly impacts your FOV choice. When using anterior-posterior phase encoding, you can often reduce the FOV in that direction to 85-90% of the frequency-encoding FOV, which decreases scan time while maintaining diagnostic quality. This adjustment works particularly well in sagittal and axial planes where anatomy naturally tapers.
Patient positioning affects FOV requirements too. Proper centering of the hip joint within the coil’s sweet spot allows for smaller FOV selections without compromising coverage. Off-center positioning forces larger FOV selections to ensure complete anatomical inclusion, potentially degrading image resolution and increasing scan times.
Slice thickness optimization for diagnostic accuracy
Slice thickness selection in hip MRI technical parameters directly impacts your diagnostic capabilities and scan efficiency. The sweet spot for most hip MRI pulse sequences falls between 3-5 mm, balancing spatial resolution with adequate signal-to-noise ratio (SNR). Thinner slices provide superior detail for detecting subtle pathology but come at the cost of increased noise and longer acquisition times.
For routine hip joint evaluation, 4 mm slice thickness with 0.4-0.8 mm gaps works well across most sequences. This thickness captures sufficient anatomical detail while maintaining reasonable SNR levels and scan times that patients can tolerate. T1-weighted sequences can handle slightly thicker slices (4-5 mm) since they inherently provide better SNR, while T2-weighted and STIR sequences benefit from staying closer to 3-4 mm thickness.
Specialized hip MRI pathology protocols may require thinner sections. Labral tear evaluation often benefits from 3 mm slices in the oblique axial plane, where the improved through-plane resolution helps distinguish between normal labral variants and true pathology. Cartilage assessment protocols frequently use 2-3 mm slices to provide the detail necessary for grading cartilage defects accurately.
Gap selection between slices requires careful consideration. While small gaps (10-20% of slice thickness) help prevent cross-talk between adjacent slices, they can create blind spots where small lesions might hide. Contiguous slices eliminate this risk but may introduce cross-talk artifacts, particularly in fast spin-echo sequences. Most modern scanners handle 0.4-0.8 mm gaps well without significant artifacts.
Strategic Imaging Planes for Comprehensive Hip Assessment
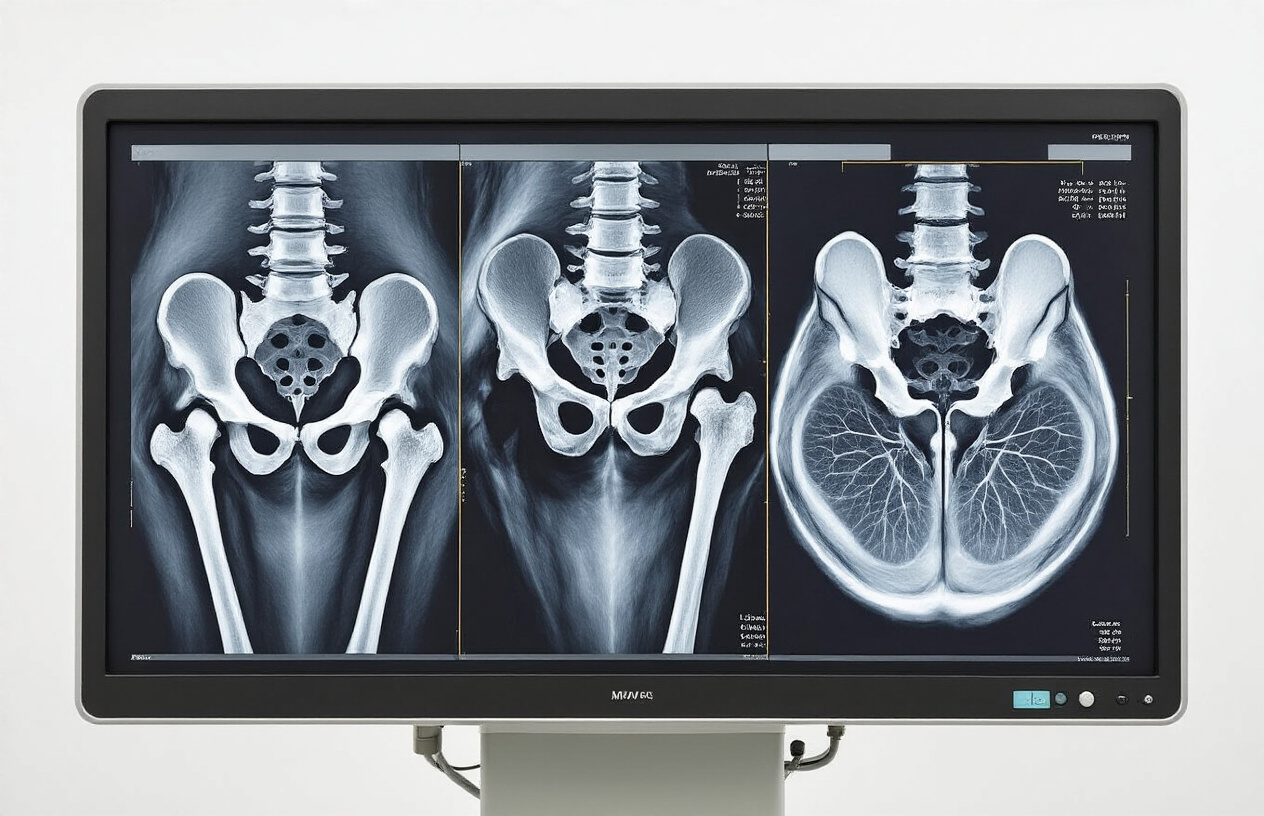
Coronal Plane Imaging for Joint Space Evaluation
Coronal imaging serves as the cornerstone of hip MRI imaging planes for evaluating joint space pathology and overall hip architecture. The coronal plane provides an ideal anatomical view that mimics the frontal radiographic perspective, making it particularly valuable for radiologists familiar with conventional hip imaging.
The coronal T1-weighted sequences excel at demonstrating bone marrow signal and detecting early avascular necrosis of the femoral head. These sequences reveal the normal high signal intensity of fatty marrow, making any areas of abnormal signal immediately apparent. Coronal STIR or T2-weighted fat-saturated images complement the T1 sequences by highlighting bone marrow edema, joint effusions, and soft tissue inflammation around the hip joint.
For optimal hip MRI parameters in the coronal plane, slice thickness should range between 3-4mm with minimal gap to ensure complete coverage of the femoral heads and acetabula. The field of view typically measures 32-38cm, encompassing both hip joints for comparison. This bilateral approach proves essential when evaluating conditions like osteonecrosis, where bilateral involvement occurs frequently.
Coronal sequences effectively demonstrate acetabular labral tears, particularly at the superior and posterosuperior aspects where most pathology occurs. The relationship between the femoral head and acetabulum becomes clearly visible, allowing assessment of hip dysplasia, femoroacetabular impingement morphology, and joint space narrowing associated with osteoarthritis.
Axial Sequences for Cross-Sectional Anatomy Visualization
Axial hip MRI pulse sequences provide unparalleled visualization of cross-sectional anatomy and prove indispensable for evaluating complex hip pathology. These sequences offer unique perspectives of the femoral head-neck junction, acetabular rim, and surrounding soft tissue structures that coronal and sagittal planes cannot adequately demonstrate.
The axial plane excels at detecting cam-type femoroacetabular impingement by clearly showing the abnormal bone formation at the anterior femoral head-neck junction. T1-weighted axial images provide excellent anatomical detail of the bone contours, while T2-weighted sequences with fat saturation highlight associated soft tissue changes and joint effusions.
Axial sequences prove particularly valuable for evaluating the anterior and posterior acetabular labrum. The cross-sectional view allows direct visualization of labral morphology, tears, and associated paralabral cysts. When combined with intraarticular contrast in MR arthrography protocols, axial images provide superior sensitivity for detecting subtle labral pathology.
MRI hip joint planning for axial sequences requires careful attention to slice orientation. Images should be prescribed perpendicular to the long axis of the femoral neck, ensuring consistent anatomical representation across all slices. Slice thickness of 3-4mm with minimal gap provides adequate resolution while maintaining reasonable scan times.
The axial plane also demonstrates the relationship between the sciatic nerve and surrounding structures, making it valuable for diagnosing piriformis syndrome and other causes of posterior hip pain. Hip muscle groups, including the deep external rotators and gluteal muscles, are optimally visualized in this plane, allowing assessment of muscle strains, tears, and atrophy patterns.
Specialized Protocols for Common Hip Pathologies
Labral tear detection sequences and positioning
Detecting acetabular labral tears requires specialized MRI hip joint protocols that go beyond standard hip imaging approaches. The acetabular labrum, a fibrocartilaginous ring that deepens the hip socket, appears as a dark triangular structure on most MRI sequences. However, identifying subtle tears demands specific pulse sequences and careful patient positioning.
T1-weighted sequences with fat saturation provide excellent contrast between the labrum and surrounding joint fluid, making small tears more visible. T2-weighted images with fat suppression are equally valuable, as they highlight increased signal intensity within torn labral tissue. The key lies in using thin-section imaging with slice thickness of 3-4mm to capture the delicate labral anatomy without partial volume effects.
Patient positioning plays a critical role in labral tear detection. The affected hip should be positioned in slight internal rotation (10-15 degrees) to open up the anterosuperior labral region where tears most commonly occur. Some radiologists prefer the FABER position (flexion, abduction, external rotation) for better visualization of anterior labral pathology, though this requires specialized positioning equipment.
Coronal oblique images aligned parallel to the femoral neck axis offer superior visualization of the superior and posterosuperior labrum. These hip MRI imaging planes capture labral morphology more effectively than standard anatomical planes. Adding radial sequences around the acetabular rim provides comprehensive coverage but increases scan time significantly.
Direct MR arthrography with gadolinium injection remains the gold standard for labral tear detection, achieving sensitivity rates above 90%. The contrast agent fills labral defects, creating bright signal that contrasts sharply with the dark labral tissue on T1-weighted fat-suppressed sequences.
Osteonecrosis imaging protocols for early detection
Early detection of femoral head osteonecrosis requires targeted hip MRI protocols that can identify bone marrow changes before conventional radiography shows abnormalities. Standard hip MRI pulse sequences must be optimized to detect the subtle signal changes that occur in the earliest stages of avascular necrosis.
T1-weighted sequences without fat suppression serve as the foundation for osteonecrosis detection. These images clearly demonstrate the characteristic “double-line sign” – a inner hyperintense rim surrounded by a hypointense outer border that defines the necrotic segment. The T1 sequence also shows the geographic pattern of marrow replacement that distinguishes osteonecrosis from other conditions.
T2-weighted images with fat saturation complement T1 findings by revealing bone marrow edema surrounding the necrotic area. This reactive edema often appears before the classic double-line sign becomes visible, making fat-suppressed T2 sequences valuable for detecting the earliest stages of the disease process.
STIR (Short TI Inversion Recovery) sequences provide exceptional sensitivity for detecting bone marrow abnormalities. The uniform fat suppression achieved with STIR makes it superior to frequency-selective fat saturation techniques when dealing with magnetic field inhomogeneities around the curved femoral head.
Coronal T1 and T2-weighted images aligned perpendicular to the femoral neck axis provide optimal visualization of the weight-bearing dome of the femoral head where osteonecrosis typically begins. Sagittal images help assess the anterior and posterior extent of necrotic segments, which directly impacts treatment planning.
Hip MRI technical parameters should include high spatial resolution with matrix sizes of at least 512 x 384 to clearly delineate the margins of necrotic areas. Slice thickness should not exceed 4mm to avoid missing small lesions or underestimating the true extent of involvement.
Quality Control Measures for Consistent Results
Motion Artifact Prevention Strategies
Patient positioning plays a crucial role in achieving high-quality hip MRI imaging. Secure the patient comfortably in the supine position using foam wedges under the knees to reduce lumbar lordosis and minimize hip flexor tension. Place the feet in a neutral position with slight internal rotation, using tape or positioning devices to maintain consistency throughout the scan.
Communication with patients before starting the MRI hip joint protocol helps reduce anxiety-induced movement. Explain the scanning process, expected duration, and the importance of remaining still. Provide clear instructions about breathing patterns, especially during sequences where breath-holding isn’t required. For pediatric patients or those with claustrophobia, consider mild sedation when medically appropriate.
MRI hip joint preparation includes optimizing coil selection and placement. Surface coils should be positioned symmetrically and secured properly to prevent shifting during the examination. The body coil can serve as a backup, but dedicated hip coils provide superior signal-to-noise ratios for detailed anatomical visualization.
Monitor patient comfort throughout the procedure. Check positioning between sequences and adjust if necessary. Use pulse oximetry when available to track patient status, particularly during longer protocols. For patients with hip pain, consider pain medication administration before scanning to improve compliance and reduce involuntary movement.
Image Optimization Troubleshooting Techniques
When encountering poor image quality during hip MRI technical parameters optimization, systematic troubleshooting approaches yield the best results. Start by evaluating signal-to-noise ratio issues, which often stem from improper coil positioning or patient movement. Reposition coils closer to the anatomy of interest and ensure proper connections.
Addressing ghosting artifacts requires attention to phase-encoding direction and patient positioning. Switch phase-encoding gradients from anterior-posterior to right-left when respiratory motion creates artifacts. For cardiac pulsation artifacts, consider cardiac gating or adjust the field of view to exclude the artifact from the region of interest.
Susceptibility artifacts near metallic implants demand protocol modifications. Increase receiver bandwidth, use shorter echo times, and consider STIR sequences instead of fat-suppressed T2-weighted images. Metal artifact reduction sequences (MARS) provide excellent visualization around hip prostheses when available.
Fat suppression failures commonly occur in hip MRI pathology protocols due to magnetic field inhomogeneities. Perform careful shimming adjustments and consider using STIR sequences as an alternative to chemical fat suppression. Verify center frequency calibration and adjust if necessary.
Signal dropout in areas of interest may indicate coil malfunction or poor patient-coil coupling. Check all coil connections and ensure proper loading. If problems persist, switch to alternative coil configurations or use the body coil as a backup option while maintaining adequate spatial resolution for diagnostic quality images.
Getting clear, diagnostic hip MRI images comes down to mastering the basics and paying attention to the details. From proper patient positioning and choosing the right pulse sequences to fine-tuning your technical parameters, each step builds on the next to create images that actually help with diagnosis. The different imaging planes work together to give you a complete picture of what’s happening in the hip joint, while specialized protocols help you target specific conditions more effectively.
The real game-changer is having solid quality control measures in place. When you combine good preparation, the right technical settings, and consistent protocols, you’ll see a dramatic improvement in image quality and diagnostic confidence. Take the time to review your current hip MRI approach and see where you can tighten things up – your radiologists and patients will definitely notice the difference.